1.Installation
1.1.Hardware and Software Requirements
6MoNPlus has been developed and tested mainly on Debian Linux 8 and 9 distributions (32 and 64 bit version) and on Ubuntu 16.X and 18.X.
The installation process modifies some system files. For this reason, we suggest to use a dedicated physical/virtual machine or a privileged LXC Container.
6MoNPlus does not require special hardware configurations, however for best performance it is recommended to adopt a system with the following characteristics:
- Core and Frontend (they can be installed in the same machine or in two separate machines):
CPU >= 2 cores @ 2GHz, RAM >= 2 GB, HDD >= 20GB, 1 Network Interfaces - Probes:
The minimum requirement is equivalent to Raspberry Pi 3 model B hardware, running the Raspbian Linux as OS.
Other systems, running a Debian-Like Linux distro, with better performance are compatible.
1.2.Network architecture
The 6MonPlus architecture is based on three components, Frontend, Core and Probe. Each component can be installed on different machines. The most common cases are:
Centralized scenario, every components are installed on a single monitoring machine
Distributed scenario, Frontend and Core are installed on the same machine and one or more probes are installed on remote devices.
1.3.How to install the Frontend
- Download the Frontend installation tarball
- Make sure you have an active Internet connection on the system where you are going to install the Frontend
- Log in to the system as root
- Extract the tarball (tar xzvf sixmon-plus-fe-X.Y.Z.tar.gz)
- Type cd sixmon-plus-fe-X.Y.Z
- Read and follow the instructions contained in the INSTALL file
- Run ./install-frontend.sh
1.4.How to install the Core
- Download the Core installation tarball
- Make sure you have an active Internet connection on the system where you are going to install the Core
- Log in to the system as root
- Extract the tarball (tar xzvf sixmon-plus-core-X.Y.Z.tar.gz)
- Type cd sixmon-plus-core-X.Y.Z
- Read and follow the instructions in the INSTALL file
- Run ./preconfigure.sh
- Type ./configure; make; make install
- If the Core and the Frontend are installed in separate servers read
How to configure the Core in another server - Start the Core typing systemctl start sixmon-plus-core.service
1.5.Probes
1.5.1.How to install a Probe
- Download the probe installation tarball
- Make sure you have an active Internet connection on the system where you are going to install the Probe
- Log in to the system as root
- Extract the tarball (tar xzvf sixmon-plus-probe-X.Y.Z.tar.gz)
- Type cd sixmon-plus-probe-X.Y.Z
- Read and follow the instructions in the INSTALL file
- Run ./preconfigure.sh
- Type ./configure; make; make install
- Register the probe on 6MoNPlus (How to register a probe section)
1.5.2.How to register a Probe
Only superusers can register a Probe on the system. By default, the user registered during the Frontend installation has superuser privileges. For more details about user permissions, read create a user or edit a user sections.
- Open the main page of the Frontend.
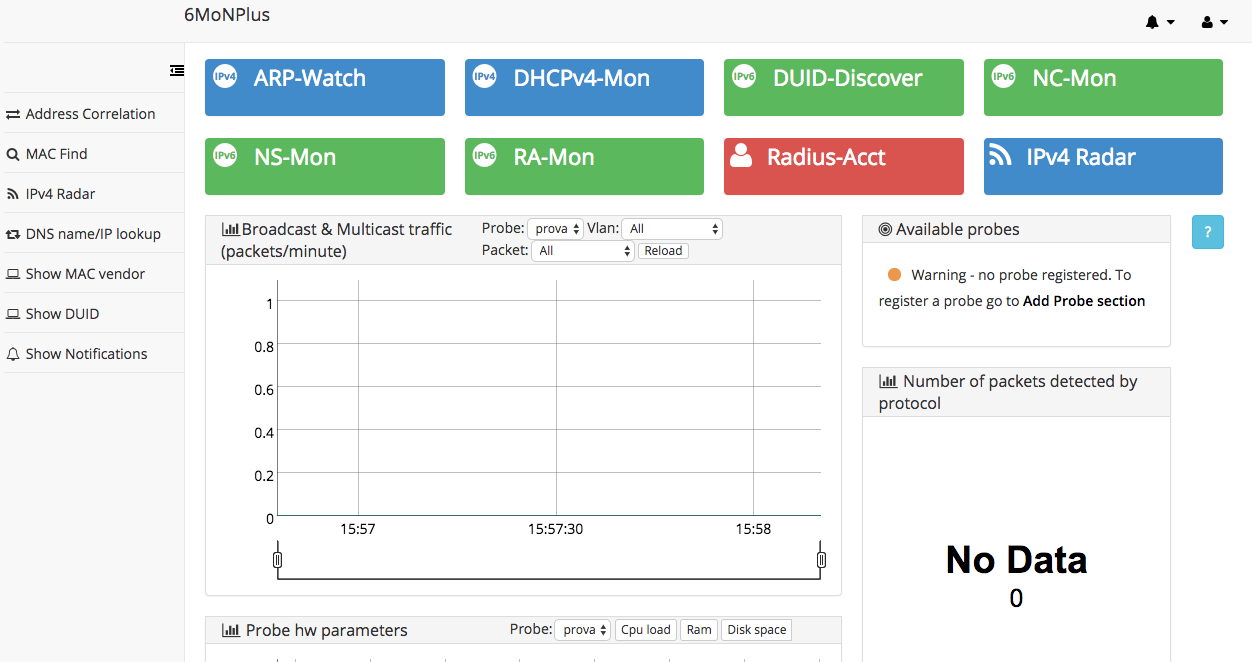
- If no Probes have been registered yet, a warning message (figure 1) should appear in the Available probes panel.
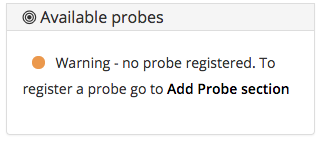
If you click on add probe section, you will access to page described at point 3 below.
- If you have already installed at least one Probe, you should follow the steps below:
- Click on the user icon placed in the top right corner of the page to open the user actions menu and select Global settings.
- Click on Configuration/Probes,then click Add probe in the top of the page.
- Fill the required fields of the add probe form, then click Save.
- Click on Certificates and keys to download the tarball, needed to setup SSL communication between this Probe and the Core.

- Place the downloaded tarball (*probeid*.tar.gz) in any directory of the machine where you have installed the Probe.
- Type tar xPf *probeid*.tar.gz
- It may be necessary to double check if the probe has correctly detected the name of the system network interface.
This task can be accomplished by editing the file /etc/sixmon/probe-arguments.conf. The value to be edited with the correct system network interface’s name is the one pointed by the keyword interface. To obtain a list of all the network interfaces detected by the system, it could be executed the shell command: ip addr. - Start the probe typing systemctl start sixmon-plus-probe.service
- Click on the user icon placed in the top right corner of the page to open the user actions menu and select Global settings.
1.5.3.How to delete a Probe
Warning: this operation will also delete all the data associated with the Probe.
- Click on the user icon placed in the top right corner of the page to open the user actions menu and select Global settings.

- Click on Configuration/Probes. A list of registered Probes will be displayed.
- Select the Probe you want to delete clicking on its Probe id.

- Click Delete.
2.Configuration
2.1.First Login
After the very first login to 6MoNPlus, you will be redirect to a form to create a Certification Authority, needed to implement secure communication between Core and Probes.
- Fill all the fields and click on Save (in the bottom left side of the page).
- After this step, a new form to create a certificate and a key for the Core will appear.
Click on Save and you will be redirected on the main page of 6MoNPlus.
- If you have not completed yet the installation of the other system’s components, read sections:
If you chose to install the Core and the Frontend in two separate servers, read section How to configure the Core in a separate server.
2.2.How to configure the Core in a different server
- Click on the user icon placed in the top right corner of the page to open the user actions menu and select Global settings.
- Place the downloaded tarball (server.tar.gz) in any directory of the machine where the Core is installed.
- Type tar –xPvf server.tar.gz
- Start the Core typing systemctl start sixmon-plus-core.service
2.3.Basic Configurations
2.3.1.How to configure MAC Find
- Click on the user icon placed in the top right corner of the page to open the user actions menu and select Global settings.
- Click on Configuration/Probes.
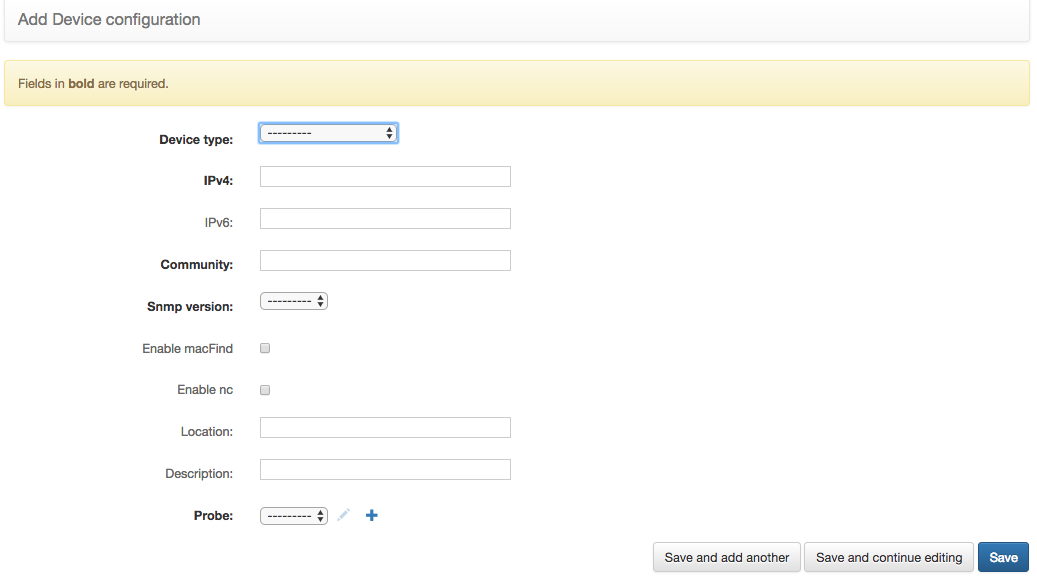
- Click on Add device configuration in the top of the page and fill the form’s fields. Make sure to check Enable macFind.
2.3.2.How to configure Neighbor Cache
In order to enable this feature on 6MoNPlus, you should have added at least an IPv6 compliant router. You can add a new router following these steps:
- Click on the user icon placed in the top right corner of the page to open the user actions menu and select Global settings.
- Click on Configuration/Probes.
- Click on Add device configuration in the top of the page and fill the form’s fields.
- Specify ROUTER as Device Type
- If you want to allow 6MoNPlus to periodically retrieve the IPv6 Neighbor Cache from this Router, make sure to check Enable nc.
2.3.3.How to configure IPv4 Radar
The IPv4 Radar functionality allows to monitor the IPv4 addresses distribution in a subnet. You can have many subnets associated with a single Vlan and you can configure those associations following the steps below:
- Click on the user icon placed in the top right corner of the page to open the user actions menu and select Global settings;
- Click on Configuration/Probes, then Vlans and Network association;
- Click Add vlan_subnet in the top of the page;
- Fill the fields Probe Vlan, Ipv4 Network and Netmask length.
If everything has gone fine, you will be now able to consult the addresses distribution in every specified subnet, from the main page clicking on the IPv4 Radar blue button.
2.3.4.How to configure Notifications
- Click on the user icon placed in the top right corner of the page to open the user actions menu and select Global settings;
- In the section Configuration click on Generic configuration;
- Use the Filter drop down menu (in the top-right of the page) to display only the entries concerning the Notifier module;

- The table below gives an idea on how configuration parameters, for the Notifier module, should be set.
| Param Name | Param Value (e.g.) | Param Description |
| smtp.server | smtp://smtp.foobar.xyz | the SMTP server used by 6MoNPlus to send notifications via email |
| sender.email | sender@nullfoobar.xyz | the email address used by 6MoNPlus Notifier while sending notifications |
| sender.name | 6MoNPlus Notifier | the name associated with the specified email |
| email.subject.prefix | [6MoNPlus] | a short text to prepend to notification subjects |
| non.rep.threshold | 3600 | a time limit within which the same notification cannot be sent more than one time |
| sender.username | sender_user | the username used to log in to the SMTP server |
| sender.password | sender_pass | the password used to log in to the SMTP server |
| tls.enabled | true | if true enables TLS |
| smtp.port | 587 | the TCP port where the SMTP server is listening on |
| email.footer | An awesome footer | a custom text to append to notification bodies |
| frontend.url | http://fe.foobar.xyz | the URL of the 6MoNPlus frontend |
- Click on the line with param name equal to smtp.server to configure the SMTP server param value (e.g. smtp://smtp.foobar.xyz/).
- Click on the line with param name equal to sender.email to configure the sender email.
- Click on the lines with param name equal to sender.name, sender.username, sender.password and set the sender name used in 6MoNPlus e-mails, the login and the password of the sender account.
2.4.Advanced Configurations
2.4.1.Authentication and Authorization system
The 6MoNPlus authentication system handles both authentication and authorization. Authentication verifies if a user is really who he claims to be, while authorization determines what an authenticated user is allowed to do.
So the system consists of:
- Users
- Permissions: to designate whether a user may perform a task or not.
- Groups: A generic way to apply permissions to more than one user.
- Probes, Vlans and Modules that define the classification of network data.
Explaining in a simpler way, the system consists of user entities (Groups, Users) and application entities (Probes, Vlans and Modules).
The associations between user entities and application entities determine custom permissions.
User accounts can be of two types: superuser account and custom user account.
Superuser account
A superuser account has the privilege to have the complete view of the whole system. It has the total control on both system configurations and other user’s permissions. It can also display all the data sniffed by probes.
The account configured during the Frontend installation is a superuser account.
Visit User account section to have more detail about Users and visit Edit user subsection to know how define a superuser account.
Custom user account
A superuser can define custom privileges on other accounts. Those privileges, generally, are a subset of superusers’ privileges, therefore they can concern:
- the tasks a selected user can perform;
- data visualization;
- system’s configurations managing.
The system automatically discovers Vlans and associates them to the discovering Probe, creating one-to-one associations Probe-Vlan. A superuser can define which Groups, then indirectly Users, are allowed to display all the data related to the discovered Probe-Vlan(s).
A superuser can define custom permissions on other accounts in order to rule which tasks the selected user can perform and which data can be displayed.
A superuser could also give to a selected user the privilege to manage system’s configurations. It is also possible to create different types of associations between data, and some of these have to be necessarily configured to allow data visualization.
The system automatically detects associations between Probes and Vlans and allows correlation with Users and Groups to define permission. In details this association are required for custom users:
- Associations between User(s) and Group(s)
- Associations between Group(s) and Probe-Vlan(s)
Read Association between Probes and Vlans for more information about Probes and Vlan association.
If you have not created a group or a custom user yet, visit Create a User or Create a Group to learn how to create a User or Group.
To associate a Group with a Probe-Vlan, read How to Associate a Groups with Probes and Vlans.
To associate a Group with a Probe-Vlan, visit the How to associate a User with a Group.
2.4.1.1.Groups
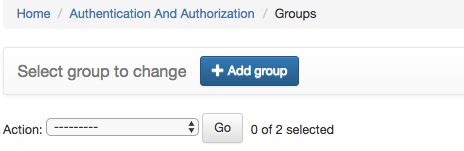
2.4.1.1.1.Create a group
- Click on the user icon in the top right of the page and select “Global settings”.
- Click “Groups” in “Authentication and Authorization” section.
- Click “Add Group” in the top of the page and you will be redirected to a form page.
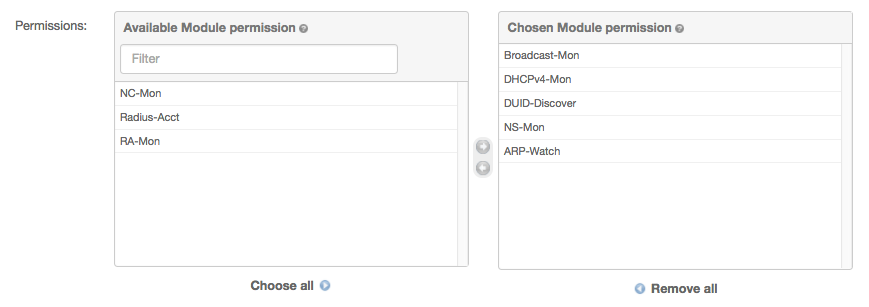
The “name” field sets the name of the Group while the upper selections (Available Module permissions and Chosen Module permissions) set group permission to manage modules and configurations. See Group permissions section for further information.
The “Available Users” and “Chosen Users” sections associate users to the group.

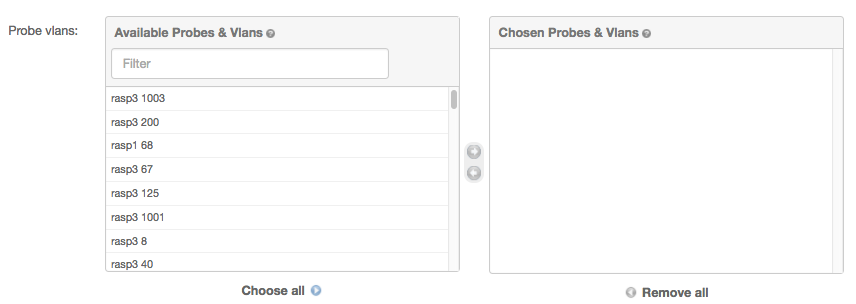
The “Available Probes & Vlans” and “Chosen Probes & Vlans” sections are useful to associate a group with a set of Probe-Vlans.
- After you have chosen the permission to Set, the users of the groups and the Probe-Vlan associated, click on “Save” in the bottom-right of the page.

2.4.1.1.2.Group permissions
- The line “Broadcast-Mon” allow the visualization of “broadcast & multicast graph” in the main page.
- The line “DHCPv4-Mon” allow the visualization of DHCPv4-Mon data and correlation in the main page.
- The line “DUID-Discover” allow the visualization of DUID-Discover data in the main page
- The line “NC-Mon” allow the visualization of NC-Mon data in the main page.
- The line “NS-Mon” allow the visualization of NS-Mon in the main page.
- The line “Radius-Acct” allow the visualization of Radius-Acct data in the main page.
- The line “RA-Mon” allow the visualization of RA-Mon in the main page.
- The line “ARP-Watch” allow the visualization of ARP-Watch in the main page and in the global settings page.
2.4.1.1.3.Edit a group
- Click on the user icon in the top right of the page and select “Global settings”.

- In the “Authentication and Authorization” section click on Groups. The list of available groups will be displayed.

Click on the group line you want to edit. You will be redirected in a form with all the group properties.
- If You want to change the group name, edit the “Name” field
- If You want to edit group permission, add or remove permissions from the “Chosen Permission” section . See create groups – permissions to have a description of all the types of permission.
- If You want to edit user belonging to group, add or remove permissions from the “Chosen Users” section.
- If You want to enable or disable an association between a Probe-Vlan and this group, add or remove a Probe-Vlan from the “Chosen Probes & Vlans” section.
After these operation, click Save in the bottom-right of the page.
2.4.1.1.4.Delete a Group
- Click on the user icon in the top right of the page and select “Global settings”.
- In the “Authentication and Authorization” section click on Groups. The list of available groups will be displayed.
There are two ways to delete a group:
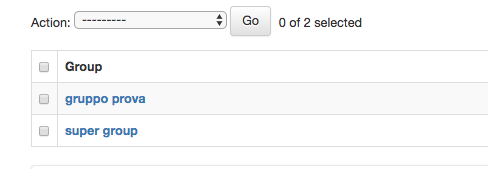
- Click on the checkbox menù associated to a group and select “ Delete selected groups” from “Action” and Click “Go”.
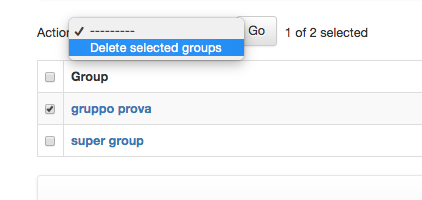
In this way You can also delete multiple groups.
- Click on the group line you want to edit. You will be redirected to a form with all the group properties. Click on “Delete” on the bottom left of the page and confirm.
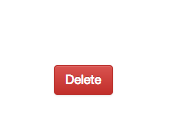
With this method You can delete only a group at a time.
2.4.1.1.5.Associate a Group with Probes and Vlans
- Click on the user icon in the top right of the page and select “Global settings”.
There are two way to associate a Group with a Probe-vlan:
- Click on Groups in the “Authentication and Authorization” section. A list of available groups will be displayed.
Click on the group you want to edit. You will be redirected to a form with the group properties.
Use the “Probe Vlans” section to associate Probe-Vlans to this group, adding these in the “Chosen Probes & Vlans” section.
Click Save on the bottom right of the page.
- Click on “Groups, Probes and Vlans association” in Configuration section. You will be redirected in a page with a list of Group and Probe Vlan association (if exists). Click on “Add group_probe_vlan”.

In the resulting form, select The Probe Vlans and Groups to associate.
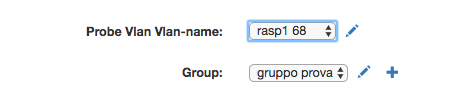
Click on the pencil to edit a Probe Vlan (Probe-vlan section) or to edit a Group (Edit a group section). Click on the Plus icon to add a Group (Create group section)
Click on “Save” on the bottom right of the page.

2.4.1.1.6.Remove a Group-Probe-Vlan association
There are two way to remove a Group Probe-Vlan association :
- Click on Groups in the “Authentication and Authorization” section. A list of available groups will be displayed.
Click on the group you want to edit. You will be redirected to a form containing the group properties.
In the “Probe Vlans” remove from “Chosen Probes & Vlans” section the Probe-Vlan You want to dissociate from group.
Click Save on the bottom right of the page.
- Click on “Groups, Probes and Vlans association” in Configuration section. You will be redirected to a page with a list of Group and Probe Vlan association.
Check the association You want to delete and from the Action list select “Delete Groups, Probe and Vlan association” .
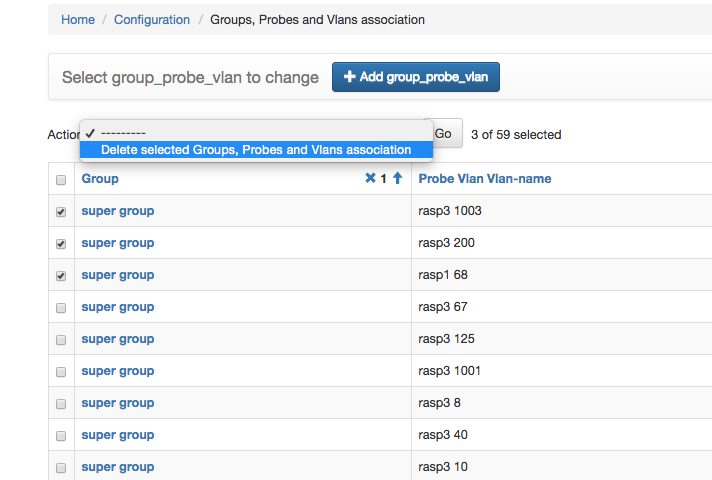
Click “Go” and confirm.
2.4.1.2.Users
2.4.1.2.1.Create a user
- Click on the user icon in the top right of the page and select “Global settings”.
- Click on “Users” in “Authentication and Authorization” section.
- Click “Add User” at the Top of the page and you will be redirected to a new page.
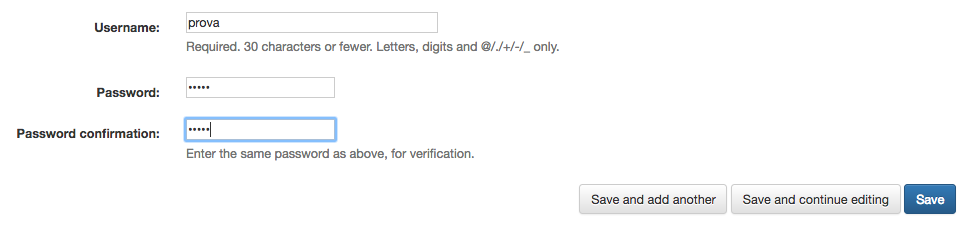
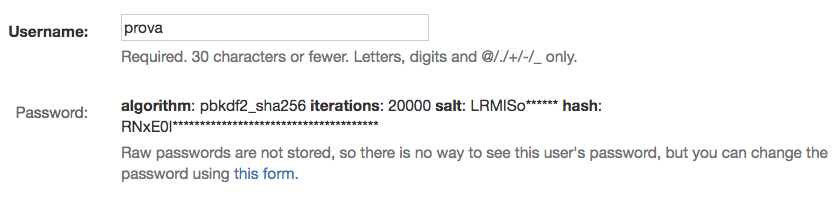
- Fill Username, password and password confirmation fields, click “Save” and You will be redirected to another page with other User options.
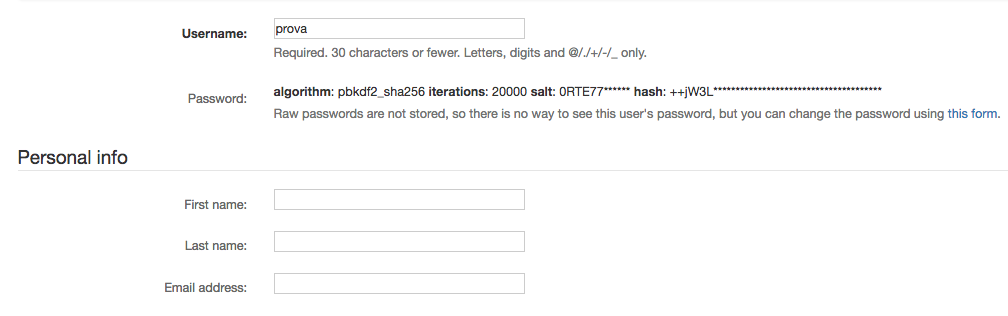
The first section of the form contains optional personal information (Username, password, first name, last name, email address).
If You want to change password, click on the blue password link.
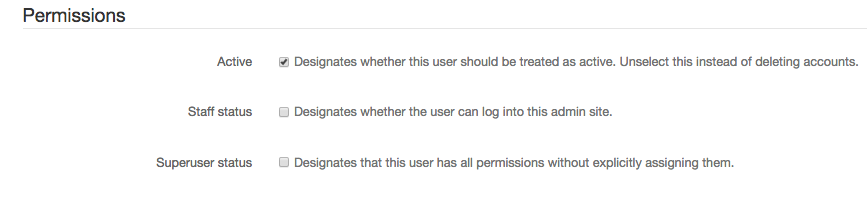
The next section contains special permission. There are three checkbox:
- Uncheck “Active” if You want to disable an account instead of delete it.
- Check “Staff status” if You want to enable permission for Use to log on configuration page.
- Check “Superuser status” if You want to set this User as Superuser account
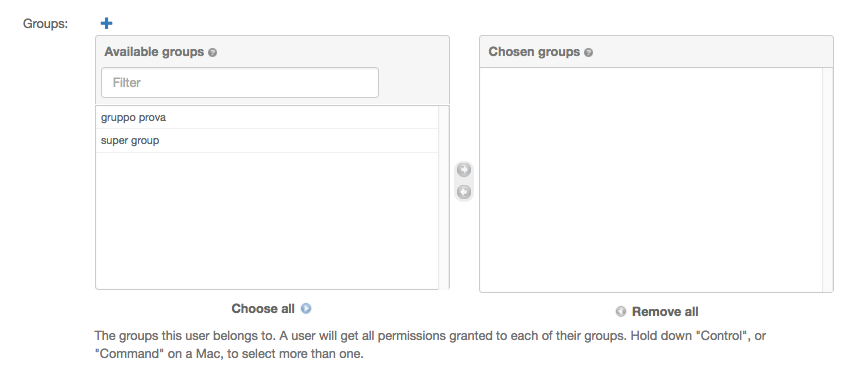
In the Groups section it is possible to associate user to groups double-clicking or selecting lines from “Available Groups” to “Chosen Groups” sections.
If you click the blue plus-shaped icon, you will be redirected to the create group page (further details in the Create Group section).
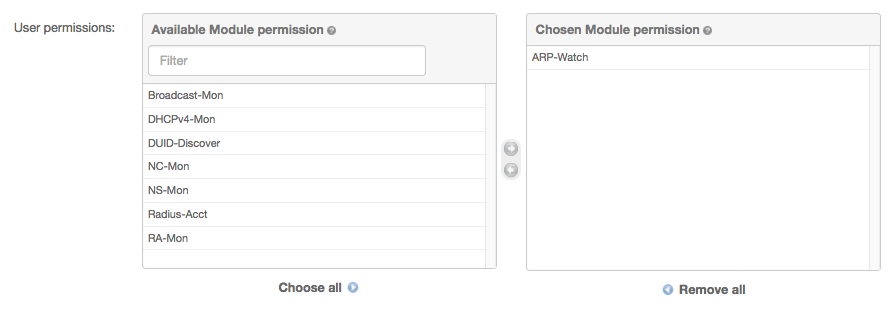
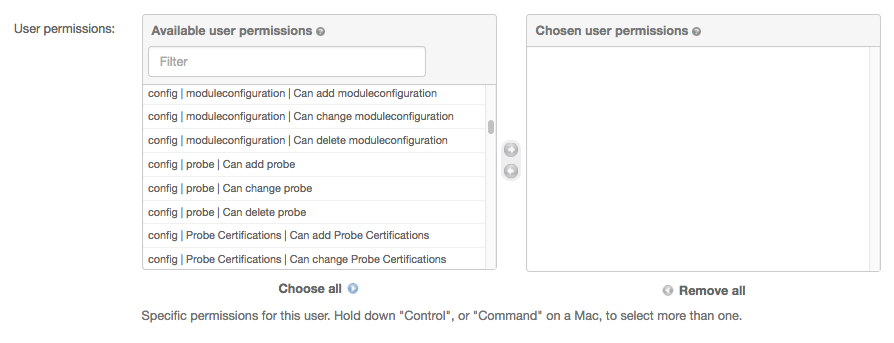
In the User permissions section you can move permissions from the Available User permissions list to the Chosen user permission list, in order to assign custom permissions to a User.
Note: User also inherit permissions from the group it belongs to. You cannot assign authorization permission to a single User, but only on a Group. For this reason, to assign authorization permission to a User it is mandatory to assign it to a Group with that permission enabled.
Permissions
- The line “Broadcast-Mon” allow the visualization of “broadcast & multicast graph” in the main page.
- The line “DHCPv4-Mon” allow the visualization of DHCPv4-Mon data and correlation in the main page.
- The line “DUID-Discover” allow the visualization of DUID-Discover data in the main page
- The line “NC-Mon” allow the visualization of NC-Mon data in the main page.
- The line “NS-Mon” allow the visualization of NS-Mon in the main page.
- The line “Radius-Acct” allow the visualization of Radius-Acct data in the main page.
- The line “RA-Mon” allow the visualization of RA-Mon in the main page.
- The line “ARP-Watch” allow the visualization of ARP-Watch in the main page and in the global settings page.
The “Important dates” section shows when this User has been created and when its last login has occurred.
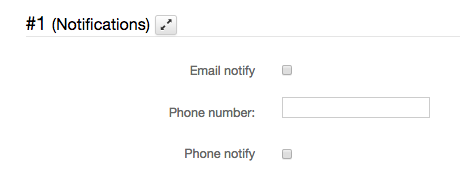
The Notification section allows users to enable/disable receiving system notifications.
Check Email notify if You want to receive email notifications.
Check Phone notify and fill Phone number if You wish to receive notification by phone.
- After You filled user options click on “Save” in the bottom-right of the page.
2.4.1.2.2. Edit a user
- Click on the user icon in the top right of the page and select “Global settings”.
- Click on Users in “Authentication and Authorization” section. From the list of users, choose the user you want to edit.
- To edit username and password read the previous section and change the related fields.
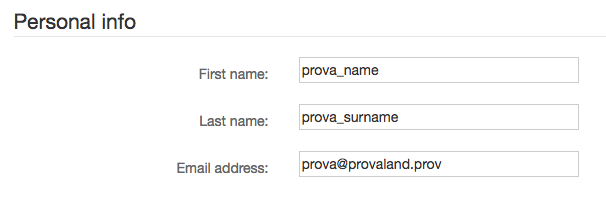
- In the Personal Info section you can change user’s first name, last name and email address.
You can manage an account status from the Permission section.
- Uncheck “Active” if You want to disable an account instead of delete it.
- Check “Staff status” if You want to allow this user to access the configuration page.
- Check “Superuser status” if You want to give to this User Superuser account privileges.
- From the Groups section, you can associate/remove the user account with/from a Group. Remove or add (double-clicking or select on lines) from “Available Groups” to “Chosen Groups” sections.
If you click the blue plus-shaped icon, you will be redirected to the create group page (further details in the Create Group section).
- If You want to customize user permissions visit the User permission section. Move permissions from “Available User permission” to “chosen user permission” to assign custom permissions to a User.
Visit create a user – permission section to know mare about permissions.
Note: User also inherit permission from the group that belongs to.
You can not assign authorization permission to a single User, but only on a Group. For this reason, to assign authorization permission to a User it is mandatory to assign it to a Group that have that permission enabled.
- If You wish to change user notification policy visit the “Notification” section.
Check “email notify” if You want to have email-notifications.
Check “phone notify” and fill “phone number” if You wish to receive notification by phone.
- When you have finished to edit user option, remember to click “Save” in the bottom-right of the page.
2.4.1.2.3.Delete a user
- Click on the user icon in the top right of the page and select “Global settings”.
- Click on “Users” in the “Authentication and Authorization” section. The list of available groups will be displayed.
There are two ways to delete a user:
- Click on the checkbox menù associated to a user and select “ Delete selected users” from “Action”. After that click “Go”.
In this way You can also delete multiple users.
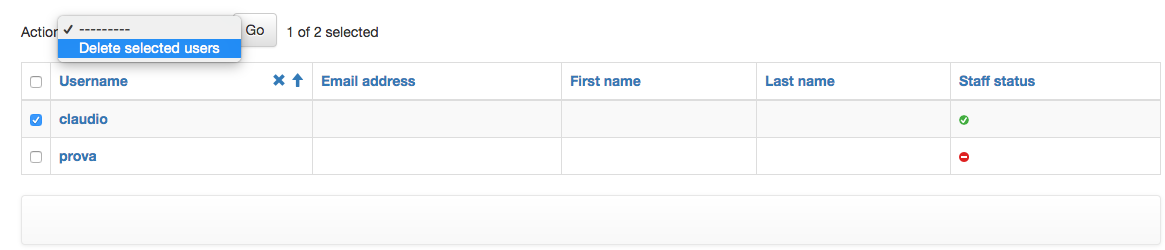
- Click on the user you want to delete. You will be redirected in a form with all the user properties. Click on “Delete” on the left-bottom of the page and confirm. With this method You can delete only a user at a time.

2.4.1.2.4. How to associate Users to Groups
- Click on the user icon in the top right of the page and select “Global settings”.
First method (associate a user to one or more groups)
- Click on “Users” in “Authentication and Authorization” section. From the list of users, click on the user you want to associate with a group.
- In the new page, scroll down until You see “Groups” section. Select the group to associate and move it from “Available Groups” to “Chosen Groups”menu.
To delete an association, move the group from “Chosen Groups” to “Available Groups”
If you click the blue plus-shaped icon, you will be redirected to the create group page (further details in the Create Group section).
Second method (associate multiple users to a group)
Click on Groups in the “Authentication and Authorization” section . A list of available groups will be displayed.
Click on the group you want to edit. You will be redirected to a form with the group properties.
Scroll down to the “Group” section. The “Available Users” and “Chosen Users” menu associate users to the group. Select the User you want to associate and move them to “Chosen Users”.
To remove a user from a group, move it from “Chosen Users” to “Available Users”.

2.4.2.Modules
2.4.2.1.Association between modules and probes
The associations between a single Probe and modules are automatically configured during the registration of the Probe.
All the modules except NC-Mon are automatically activated by default.
To see all the details about this association:
- Click on the user icon in the top right corner of the page and select Global settings.
- Click on “Probes and modules configuration” in the Configuration section.
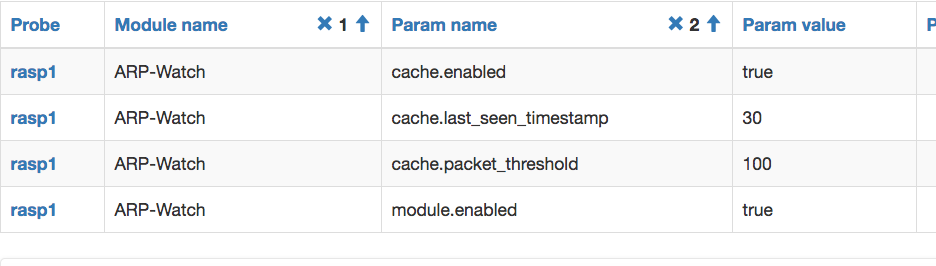
In the resulting page, each line represents a param of probe- module association.
- The column “Probe” represents the registered probes
- The column “Modules“ represents system modules
- The column “Param name” represents params to customize module configuration for each probe
- The column “Param value” contains the values of the previous params
- The column “Description” is the description of these params
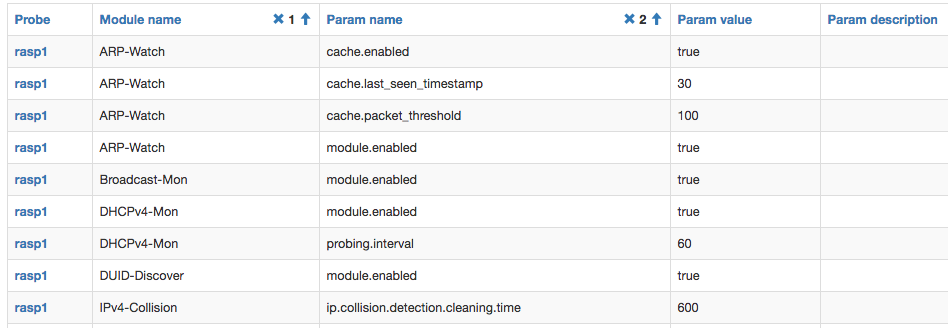
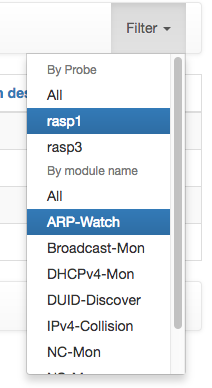
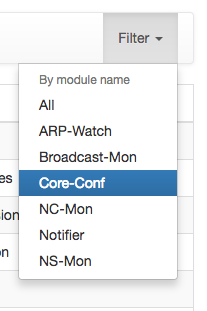
You can filter these parameters by Probe and module name using the filter menu in the top-right of the page.
To enable or disable a module visit How to enable/disable a module.
We suggest to not change any other configuration, but if you want to try click on the line you want to edit and change the “Param value” parameter.
Pay attention: changing these parameter without a valid reason can invalidate the correct functioning of the modules. Read the How to edit module configurations for further information.
2.4.2.2.How to enable/disable a module
You can enable or disable a module only if you are a superuser, or if you have the permission to do this task.
- Click on the user icon in the top right corner of the page and select Global settings.
- Click on “Probes and modules configuration” in the Configuration section.
Filter the page results using the filter menu in the top-right of the page and selecting the module of a probe you want to edit.
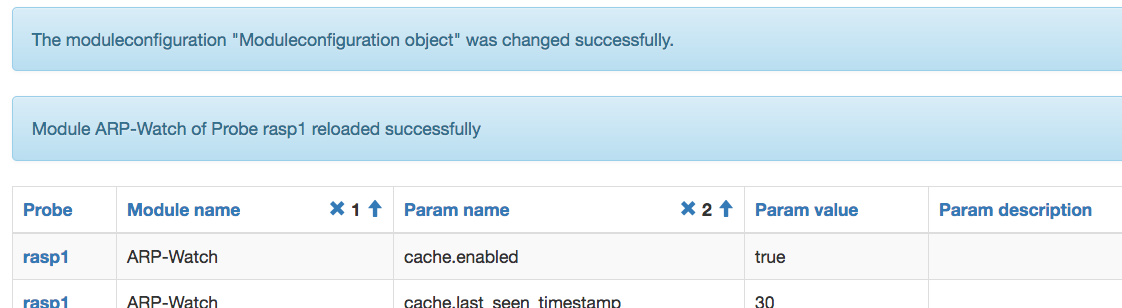
- In the filtered results click on the line with “Param name” equals to “module.enabled”.
- In the resulting page, change the value to false or true and click Save.
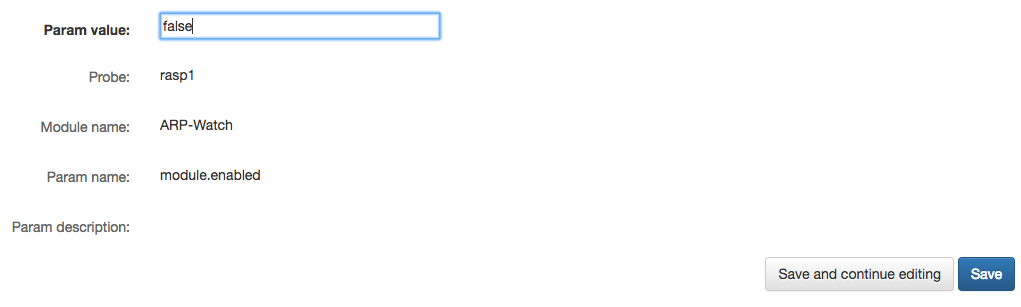
- If everything goes fine, a message with the change performed will be displayed.
2.4.2.3.Module policies
- Click on the user icon in the top right corner of the page and select Global settings.
- Click on “Probes , Vlans and Module policies” in the Configuration section. You will be redirected in a page with lines containing the association between probes and Vlan, and the module policies for each of these associations.
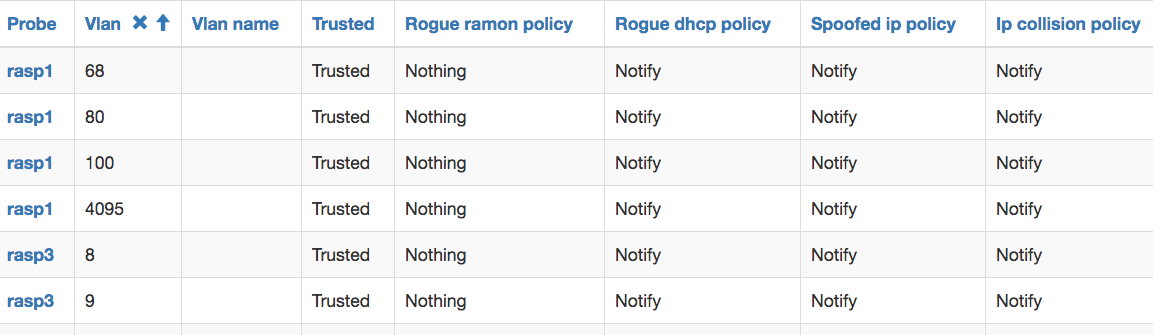
- The first two columns are respectively probe and vlan.
- The third column is the optional Vlan name.
- The “Trusted” column is used to define is a vlan is a valid vlan or not.
- The other columns define the policy to adopt for rogue router advertisement, rogue dhcp, spoofed ip or ip collision.
- To change a module policy or a Vlan name, click on the line you want to edit, a new page with the editable information will appears.
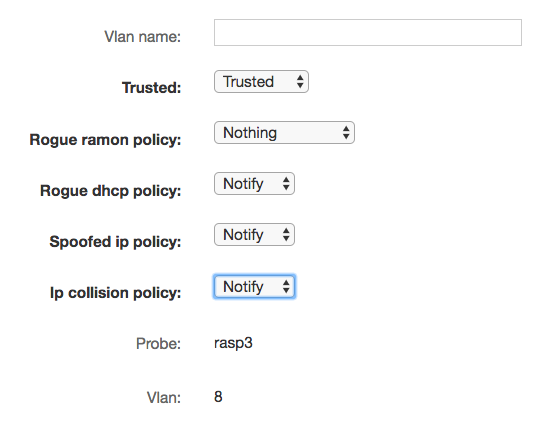
- If you want to change vlan name, edit “Vlan name”
- If you want to change a Vlan from trusted to untrusted change the “Trusted” field: this vlan will be ignored.
- To edit other policies, change the related fields.
- After you perform modification, click Save on bottom right. A message with the change performed will be displayed.
You can not delete an association between probe and vlan, which is automatically detected by the system.
2.4.2.4.How to edit module configurations
- Click on the user icon in the top right corner of the page and select Global settings.
- Click on Probes and modules configuration in the Configuration section, you will be redirected in a page like this:
- The column “Probe” represents the registered probes
- The column “Modules“ represents system modules
- The column “Param name” represents params to customize module configuration for each probe
- The column “Param value” contains the values of the previous params
- The column “Description” is the description of these params
You can filter these parameters by Probe and module name using the filter menu in the top-right of the page.

We suggest to not change any other configuration, but if you want to try click on the line you want to edit and change the “Param value” parameter.
Read the below table to know more about what the “params name” indicate.
Each single module of a given Probe has a set of parameters that can be changed from Probes and modules configuration.
All modules
| Param name | Param value (e.g.) | Param description |
| module.enabled | true | when “false” the module’ status is “stopped”, otherwise is “running” |
ARP-Watch and NS-Mon
| Param name | Param value (e.g.) | Param description |
| cache.enabled | true | when “false” the caching system is disabled |
| cache.last_seen_timestamp | 30 | if a gathered packet has in the cache for a time period greater than this value (in seconds) it must be invalidated |
| cache.packet_threshold | 100 | if a packet is sensed for a number of times greater than this value, it must be invalidated |
DHCPv4-Mon
| Param name | Param value (e.g.) | Param description |
| probing.interval | 60 | this value (in seconds) instantiate a timer. When the timer expires a DHCPv4 DISCOVER message is generated by the Probe; then the timer is restarted. |
IPv4-Collision
Every ARP REQUEST is stored in the collisions detections’ map, in order to be passively monitored. To detect collisions, this map needs to be constantly updated: adding new candidates, removing those ex-candidates that have been residing in the map for too long time.
When two or more requests are carrying the same IP but different MAC Addresses, the IPv4-Collision detection module generates a broadcast ARP REQUEST looking for that IP. If two or more ARP REPLIES are then gathered in a given time period from the broadcast REQUEST generation, it means that the collision exists!
| Param name | Param value (e.g.) | Param description |
| ip.collision .detection.cleaning.time |
600 | This value instantiate a timer. When the timer expires all the expired request are cleaned off the collisions detections’ map |
| ip.collision .detection.intra.interval |
2 | A time period ( in seconds) within which a collision is considered to exist |
NC-Mon
| Param name | Param value (e.g.) | Param description |
| sending.interval | 600 | This value instantiate a timer. When the timer expires the router(s) neighbor caches are retrieved; then the timer is restarted. |
After you perform changes remember to click on “save” in the right bottom of the page.
2.4.3.Probes
You can modify probes configuration only if you are a superuser, or if you have the permission to do this task.
2.4.3.1.Associations between Probes and Vlans
The system can automatically detect associations between Probes and Vlans.
To view this type of associations:
- Go in the “global settings” section from the main page.
- Click on “Probes , Vlans and Module policies” in the Configuration section. You will be redirected in a page with lines containing the association between probes and Vlan, and the module policies for each of these associations.
- The first two columns are respectively probe and vlan.
- The third column is the optional Vlan name.
- The “Trusted” column is used to define is a vlan is a valid vlan or not.
- The other columns define the policy to adopt for rogue router advertisement, rogue dhcp, spoofed ip or ip collision.
- To change a module policy or a Vlan name, click on the line you want to edit, a new page with the editable information will appears.
- If you want to change vlan name, edit “Vlan name”
- If you want to change a Vlan from trusted to untrusted change the “Trusted” field: this vlan will be ignored.
- To edit other policies, change the related fields.
- After you perform modification, click Save on bottom right. A message with the change performed will be displayed.
You can not delete an association between probe and vlan, which is automatically detected by the system.
2.4.3.2.How to edit probe location
- Go in the “global settings” section from the main page.
- Click on Configuration/Probes. You will see a list of registered probes. Click on the probe you want to edit.

- In the related page, edit the location field
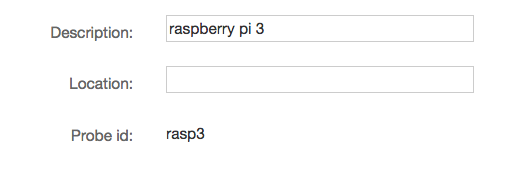
Press “Save” in the bottom- right of the page. If everything goes right, a message with the change performed will be displayed.
2.4.3.3.How to start/stop a probe
- Go in the “global settings” section from the main page.
- Click on Configuration/Probes. You will see a list of registered probes. Using the checkbox, select the probe you want.

- Click on “Action”, select the action you want to perform (Start, Stop or Reload probe) and click “Go”. If everything goes right, a confirmation message about the operations performed will be displayed.
2.4.3.4.How to Associate a Groups with Probes and Vlans
- Go in the “global settings” section from the main page.
- Click on “Groups, Probes and Vlans association” in Configuration section. You will be redirected in a page with a list of Group and Probe Vlan association (if exists). Click on “Add group_probe_vlan”.
In the resulting form, select The Probe Vlans and Groups to associate.
Click on the pencil to edit a Probe Vlan (Probe-vlan section) or to edit a Group ( Edit a group section) . Click on the Plus icon to add a Group (Add group section)
Click on “save” on the bottom right of the page.
2.4.3.5.How to remove a group-probe-Vlan association
There are two way to remove a Group Probe-Vlan association :
- Click on Groups in the “Authentication and Authorization” section. A list of available groups will be displayed.
Click on the group you want to edit. You will be redirected to a form containing the group properties.
In the “Probe Vlans” section remove from “Chosen Probes & Vlans” section the Probe-Vlan You want to dissociate from group.
Click Save on the bottom right of the page.
- Click on “Groups, Probes and Vlans association” in Configuration section. You will be redirected to a page with a list of Group and Probe Vlan association.
Check the association You want to delete and from the Action list select “Delete Groups, Probe and Vlan association” .
Click “Go” and confirm.
2.4.4.Notifications
2.4.4.1.Enable/disable notification for a user
- Go in the “global settings” section from the main page.
- Click on Users in “Authentication and Authorization” section. From the list of users, choose the user you want to edit.
Check “email notify” if You want to have email-notifications, uncheck if you do not.
Check “phone notify” and fill “phone number” if You wish to receive notification by phone.
- When you have finished to edit user option, remember to click “Save” in the bottom-right of the page.
2.4.4.2.Enable/disable notification from modules
This modification involve all the modules of a Probe-Vlan association. For this reason notifications will change for all the user related to this Probe Vlan association.
- Go in the “global settings” section from the main page.
- Click on “Probes , Vlans and Module policies” in the Configuration section. You will be redirected in a page with lines containing the association between probes and Vlan, and the module policies for each of these associations.
- To change a module policy or a Vlan name, click on the line corresponding on what you want to edit, a new page with the editable information will appears.
Rogue DHCP notification
- To edit Rogue DHCP notification change the “Rogue dhcp policy” field ( Notify or Nothing).
Spoofed Ip notification
- To edit Spoofed Ip notification change the “Rogue dhcp policy” field ( Notify or Nothing).
IP collision notification
- To edit IP collision notification change the “Rogue dhcp policy” field ( Notify or Nothing).
Rogue RA notification
- To edit Rogue RA notification change the “Rogue dhcp policy” field ( Notify or Nothing).
To know more about RA mitigation visit Enable/disable Rogue Router Advertisement mitigation section.
After you perform modification, click Save on bottom right. A confirmation message about the changes performed will be displayed.
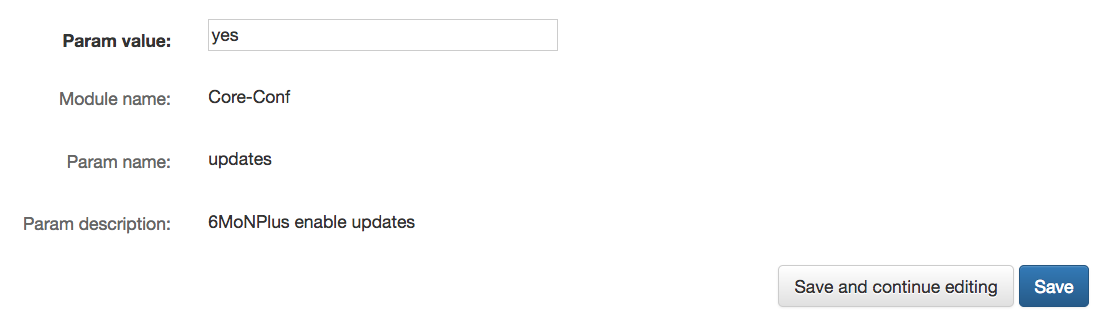
2.4.4.3.Enable/disable updates notifications
- Go in the “global settings” section from the main page.
- In the section Configuration click on “Generic configuration”.
- In the resulting page, use the Filter on top right of the page and select “Core Conf”. Select from the filtered results the line with param name equals to “updates” and click on it.
In the new page, edit “param value” from yes to “no” (or vice versa) a click “Save”. A confirmation message about the changes performed will be displayed.
2.4.4.4.Notification types
The system notify to enabled users various things monitored from network:
- New Vlan detected: this notification is generated when an unknown vlan is sensed for the first time.
- IPv4 Address collision: this notification is generated when two different nodes (i.e. different MAC addresses) are using the same IPv4Address
- Rogue DHCP server: this notification is generated when a rogue DHCPv4 Server is detected by the system;
- Legal DHCP server with new options: this notification is generated when a legal DHCP server (trusted IP and MAC Address), announces new (untrusted) options.
- New DHCP server: this notification is generated when an unknown DHCPv4 Server is detected for the very first time.
- ARP Spoofing: this notification is generated when the system detects a spoofing of a well known monitored <MAC address, IPv4 address> pair.
- Rogue Router Advertisement Detected: this notification can be generated when the system detects a Rogue ICMPv6 Router Advertisement (RA). A RA is considered Rogue if a user has set at least one legal RA for a given VLAN and Probe.
This notification can have different subtypes:- a considered legal router has its lifetime set to 0,
- a considered legal prefix has lifetime(s) set to 0,
- a considered legal router announces illegal prefix.
2.4.5.Monitored IPv4 addresses (Ipv4 spoofing)
The system allows also allows to define static associations between MAC and IPv4 addresses in a determinate VLAN.
Using these associations is possible to reveal attempts of IPv4 spoofing. Once that an attempt is revealed, the system notified to User with permissions enabled the tentative of spoofing.
Visit “Enable/disable notification for a user” or “Enable/disable notification from modules” sections to know more about notifications and “User – Edit a User” section to allow permission on User for IPv4 Monitoring addresses.
To add a new MAC -IPv4 association go in the “global settings” section from the main page and click on “Monitored IPv4 addresses” under Arp-Watch.
Click on the “Add monitored_arp button and fill all the field in the related page.

After click “Save”. A confirmation message about the new association created will be displayed.
2.4.6.Enable/disable Rogue Router Advertisement mitigation
- Go in the “global settings” section from the main page.
- Click on “Probes , Vlans and Module policies” in the Configuration section. You will be redirected in a page with lines containing the association between probes and Vlan, and the module policies for each of these associations.
- The first two columns are respectively probe and vlan.
- The third column is the optional Vlan name.
- The “Trusted” column is used to define is a vlan is a valid vlan or not.
- The other columns define the policy to adopt for rogue router advertisement, rogue dhcp, spoofed ip or ip collision.
- To change a module policy or a Vlan name, click on the line you want to edit, a new page with the editable information will appears.
- To enable Rogue Ramon mitigation, from the “Rogue Ramon policy “field select “Mitigate” or “Mitigate and Notify”. Choosing “Mitigate”, the system will detect and mitigate Rogue Router Advertisement automatically.
- After you perform modification, click Save on bottom right. A message with the change performed will be displayed.
Note: You cannot delete an association between probe and vlan, which is automatically detected by the system.
3.Using 6MonPlus – The main page
The main page of 6MoNPlus allows the interactive consultation of all the data processed and stored by the system.
The data are classified in two types:
- Probe data, regarding the probes and their status.
- Network data, regarding broadcast and multicast traffic passing through the network and eventual radius accounting data.
The first concerns 6MoNPlus management, while the latter regards all 6MoNPlus’ network monitoring tasks.
3.1.Probe data
In 6MoNPlus’ interface, data is organized in three different sections:
3.1.1.Available probes
In this section, the list of the probes registered to 6MonPlus is displayed.
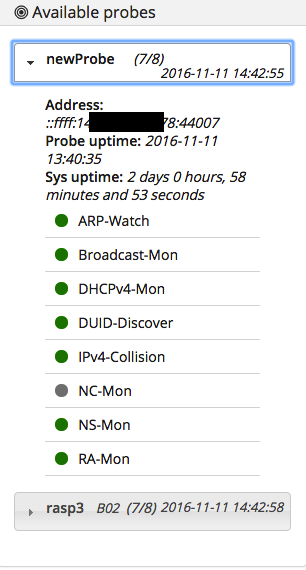
In details information is:
- The probe name (rasp1).
- The number of active modules of network traffic (7/8).
- The time of the last system check (2016-11-11 14:42:55).
- The probe address (Address).
- The time from which the probe started to monitor traffic (Probe uptime).
- The time from which the probe is turned on (Sys uptime).
- The list of running and suspended modules.
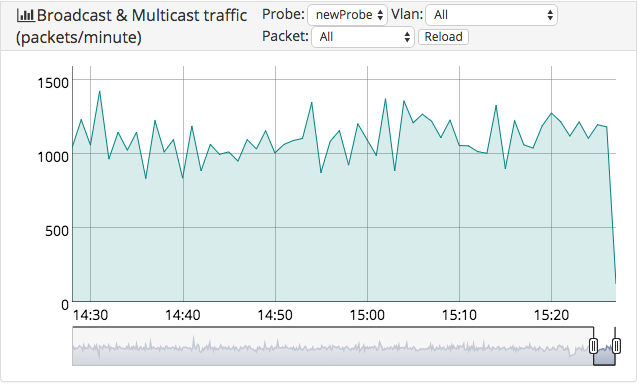
3.1.2.Broadcast & Multicast traffic
The main time series chart of this section shows broadcast and multicast data traffic detected in the last 24 hours. Data traffic can be filtered by probe, by VLAN or by packet protocol.
When filtering by probe, selecting a chart’s point will display another bar chart with the graphic ordered by VLAN or packet protocol.
On the contrary, clicking on a chart’s point when filtering by VLAN will display the traffic data ordered by packet protocol.
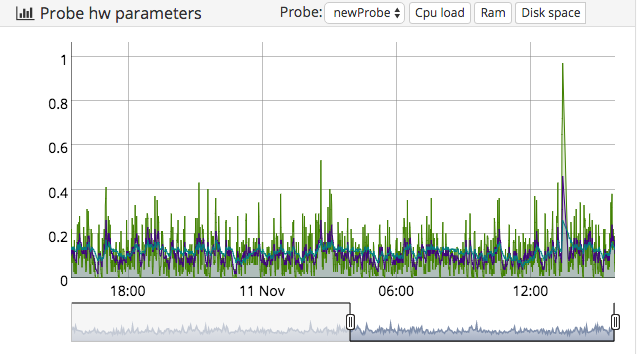
3.1.3.Probe Hw parameters
The time series charts of this section contain information about the hardware probe status in the last 24 hours. In details it is shown:
- CPU loads (sampling times 1, 5 and 15 minutes)
- memory usage (total RAM used, total RAM free, total memory cache)
- disk space (free disk space, disk space used)
3.2.Network data
All the gathered data is useful for network monitoring and managing. Data is mainly based on packets’ protocols.
Every single packet is stored in the database and packet clusterization (e.g. by network protocols or mechanisms, etc.) is represented by different graphical sections called modules. Each module represents its data set, which can be queried and filtered.
Blue modules represent IPv4 protocols, green modules represent IPv6, and red module represents the Radius Accounting utility.

The interface also provides functionalities to query and manipulate the collected data. These functionalities can be used from the main page by clicking on it and entering an inpu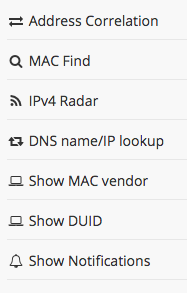 t, or interactively during the consultation of data.
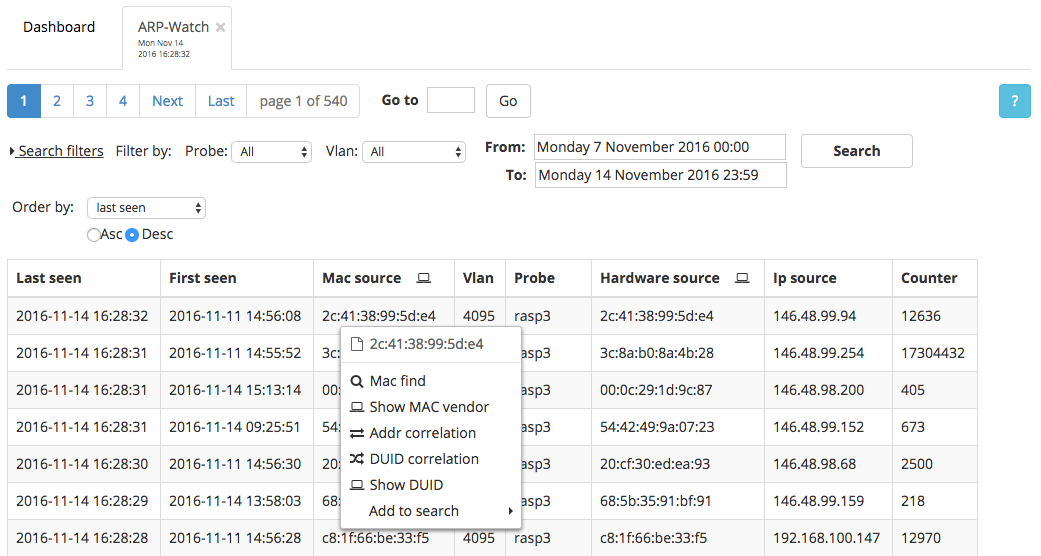
3.2.1.ARP-Watch
IPv4 hosts on a LAN use the ARP protocol to retrieve the MAC address of a neighbor host, before starting communication. 6MoNPlus listens to ARP requests (sent in broadcast on the LAN) to detect addresses conflicts or ARP spoofing attacks. The gathered ARP traffic can be also used to find correlations between MAC, IPv4, IPv6, DUID and Username in a given time period.
3.2.2.DHCPv4-Mon
This module contains useful data to detect and notify the presence of DHCP servers. DHCPv4 data is collected following this procedure:
- each Probe sends a DISCOVER message on every VLAN at a regular interval of time.
- All DHCP servers, existing in each VLAN, respond with an OFFER message.
- The Probe sends the received OFFER messages including the source MAC addresses and the source IPv4 addresses of all the DHCP servers to the CORE.
- Each DHCP OFFER message is processed by the CORE that stores the information and, in case of the existence of a new DHCP server, sends a notification message to network administrator(s).
Using the status field a user can set to legal (green), illegal (red), or new (white) the status of any detected DHCP server.
3.2.3.DUID-Discover
This module aims to track the associations between hosts’ DUIDs and MAC Addresses. This is achieved by listening to DHCPv6 Solicit multicast messages, sent by the DHCPv6 client hosts, and associating them with the device’s network hardware addresses. This data is also useful to perform DUID correlation. See DUID correlation section for more information.
3.2.4.NC-Mon
This module graphically represents the “Neighbor Cache” module, that enables the Probes to request the Neighbor Caches from the IPv6 routers using SNMP protocol.
Nodes (hosts and routers) use Neighbor Discovery Protocol (NDP) to determine the link-layer addresses of neighbours known to reside on attached links and to quickly purge cached values that become invalid. Hosts also use NDP to find neighbouring routers that are willing to forward packets on their behalf. Finally, nodes use the protocol to actively keep track of which IPv6 neighbors are reachable and which are not, and to detect changed link-layer addresses. When a router or the path to a router fails, a host actively searches for functioning alternatives.
So, all these types of data are collected and stored on 6MoNPlus.
3.2.5.NS-Mon
This module collects useful data to detect all the IPv6 address of hosts connected to the network and also for the duplicate address detection. This is performed gathering ICMPv6 packets.
3.2.6.RA-Mon
This module collects all the IPv6 Router Advertisement messages sent by routers on the network. These kinds of data are used to detect and mitigate rogue router advertisements.
3.2.7.Radius-Acct
If a RADIUS accounting is used, this module contains the RADIUS data to detect to whom belongs a particular machine.
3.2.8.IPv4 Radar
This application is based on the ARP-Watch module.
It allows displaying the IPv4 addresses utilization of a defined IPv4 subnet (Network address/netmask) monitored by a Probe.
To properly query the database, a starting date should be provided; if not provided, the IPv4 addresses utilization of the last week will be shown.
The used IPv4 addresses are green-colored, while the white-colored ones have been not used within the selected time period.
Read How to configure IPv4 Radar to properly configure this module.
3.3.Functions
3.3.1.Address correlation
The address correlation capability takes as input an IP or MAC address and returns the correlated addresses deducted from other network protocols. In particular, starting from a given input type it returns the following values:
- IPv4 ARP: Mac src, IP src, Hostname.
- IPv6 NS: Mac src, IPv6 src, ICMPv6ND NS tgt.
- IPv6 Neighbor Cache: Mac, IPv6.
- Radius Acc: UserName, CallingStationId, FramedIPAddress.
3.3.2.MAC find
The MAC find capability is used to retrieve the closest switch interface where the looked for MAC address is attached to and the related interface hierarchy. It can be invoked from the main page, directly typing a MAC address, or during data consultation, clicking on a MAC address in the page.
For further details, read “How to configure MAC find”.
3.3.3.IPv4 Radar
This application is based on the ARP-Watch module.
It allows displaying the IPv4 addresses utilization in a defined IPv4 subnet (Network address/netmask) monitored by a Probe.
To properly query the database, a starting date should be provided; if not provided, the IPv4 addresses utilization of the last week will be shown.
The used IPv4 addresses are green-colored, while the white-colored ones have been not used within the selected time period.
For further details read How to configure IPv4 Radar.
3.3.4.DNS name/IP lookup
This function, according to the provided input, returns:
- the domain name associated with the given IP address (DNS lookup),
- the IP address associated with the given domain name (reverse DNS lookup).
3.3.5.Show MAC vendor
This function takes as input a MAC address and returns the corresponding vendor name. It uses the MAC vendors API, available at http://www.macvendors.com/api
3.3.6.Show DUID
This function takes as input a MAC address and returns the corresponding DUID (if found).
3.3.7.Show Notifications
All the users’ notifications generated by 6MoNPlus are displayed within this section. It can be accessed from the main page, clicking on the lateral menu or clicking on the bell-shaped icon in the top-right corner of the page.
- To know more about the Notification type, visit the Notifications types section.
- To enable or disable notification visit the How to enable/disable notification for a user section.
- To configure notification parameters see the How to configure notifications section.
3.3.8.Show Notification
When a user is reading system’s notifications (learn more in Show Notifications), he or she can obtain more details on a single notification clicking on the chosen notification. This action will open a new tab with the details about the selected notification.
3.3.9.DUID correlation
This function can be invoked only during data consultation on blocks. It is used to retrieve the possible correlations between all the network interfaces of a single machine.
It takes as input a MAC address and check if exists a DUID associated to it. If so, for each retrieved MAC address, performs an address correlation.
For example, if a host having a certain DUID has 2 MAC addresses, wireless and wired, it is possible to correlate each of the MAC addresses to the host’s DUID. In this way we are able to tell the list of all the MAC addresses belonging to a single node.
3.3.10.Search
3.3.10.1.Quick search
The quick search allows to filter retrieved data by probe, by vlan, using a temporal window and ordering the results by a determinate param in ascending or descending way. It is located inside each module page in the middle top of the page.

3.3.10.2.Advanced search
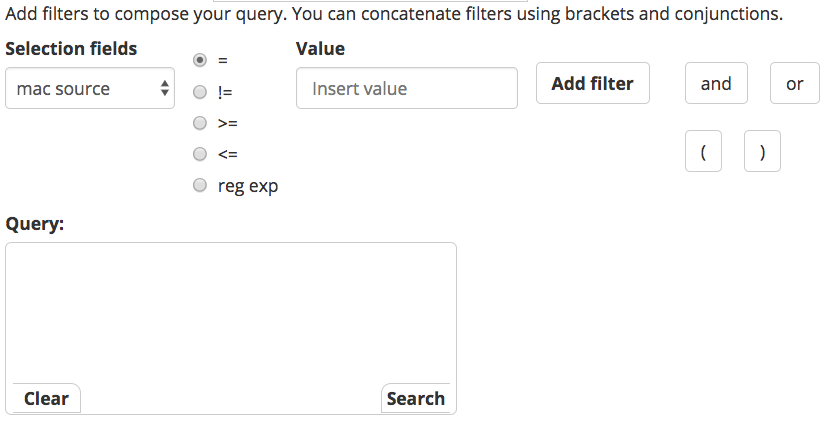
The advanced search is used to perform a more deep search inside data. It allows the formulation of logical expression using modules params and logical operators to create filters to apply to the data.
Filters can also be concatenated using brackets and conjunctions.